
Step-by-Step Guide to Adjusting Your Widgets
Widgets are a great way to make your website more user-friendly and interactive. But what if you want to customize them to fit the look and feel of your brand? You can now easily adjust colors, images, and settings for your widgets in order to make them fit with your website. This guide will walk you through step-by-step how to do it quickly and easily.
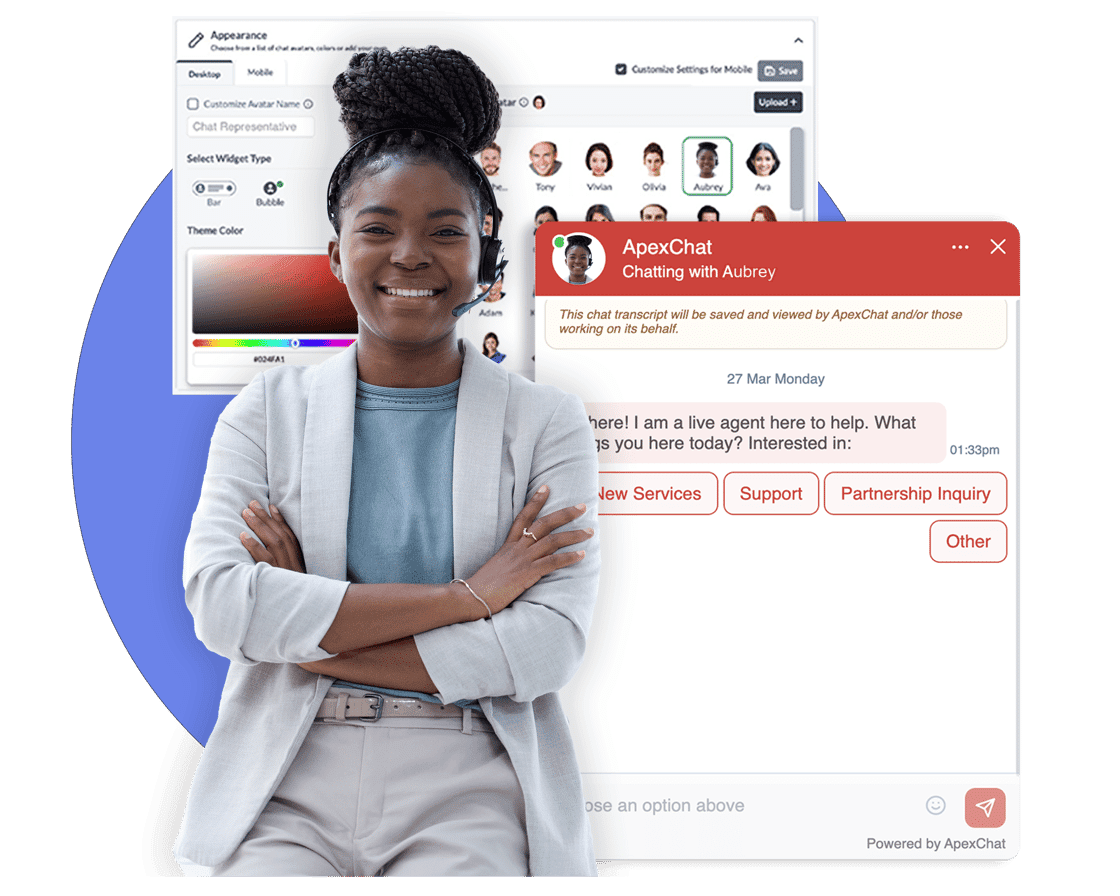
Step 1 – Click On Widget Editor in the settings section of the new portal. This will take you directly to the page where you can begin customizing your widget.
Step 2 – Once you are on the Widget Editor page, select your company and it will show you what current image you are using. From here, you can select a new agent image or logo to upload. You can also adjust the size and shape of the image using various tools such as zooming, rotating, or focusing for a desired effect.
Step 3 – To change the color of your widget, apply branding at the profile level. This will pull that color instead of the profile skin set which was previously selected. After making any changes here, make sure that they are saved before exiting out of this page.
Customizing your widgets is an easy way to ensure that they are optimized for use with your website. With just a few simple steps outlined in this guide, you can quickly adjust colors, images, and settings in order to make them fit with whatever look and feel you desire. Once all changes have been made and saved correctly users can then enjoy their newly customized widget experience!
Need help or have some questions? Reach out to us and we’ll be glad to assist you – just drop an email at [email protected].
Thank you for choosing ApexChat!
Sorry, the comment form is closed at this time.